
Every home project has the same funny turning point.
At first, it is all excitement. You save kitchen ideas. You measure the back wall. Someone says, “What if we just knocked through here?” and suddenly the whole house feels full of possibility.
Then the grown-up questions arrive.
Do we need planning permission? Where does the boundary actually sit? What is a location plan? Why is everyone talking about OS Planning Maps?
That is when the dream extension can start to feel like admin with a roof on it.
It does not need to feel that way. Whether you are planning a rear extension, garden office, porch, loft conversion, driveway change or garage conversion, the early steps are easier when you know what to check.
Here are seven simple things to sort before you start.
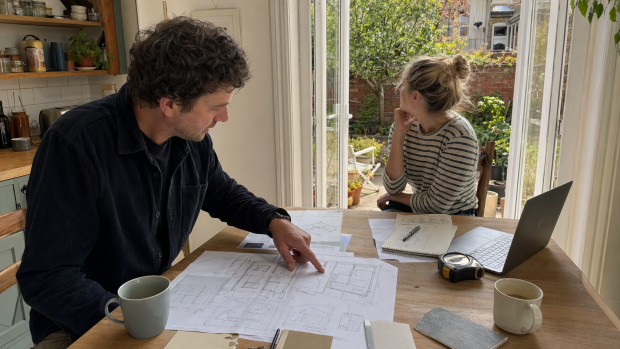
1. Work out what the room needs to fix
Start with real life, not Pinterest.
A beautiful extension is lovely. A useful extension is better.
Think about the little irritations in your home. The front door dumped the school bags. The dining table has become an office. The kitchen gets crowded as soon as more than two people stand in it.
One family might need a bigger kitchen because dinner time feels like a traffic jam. Another might need a quiet garden room because working from the sofa stopped being charming a long time ago.
Write down what is not working. Then write down what the new space must do.
More light. Better storage. Room for guests. A place for muddy shoes. A desk that is not also the breakfast table.
That list will keep you grounded when the choices start piling up.
2. Walk around outside with fresh eyes
Before you fall in love with bi-fold doors or roof lanterns, take a slow walk around the outside of your home.
Look for drains. Manholes. Trees. Sheds. Shared paths. Neighbouring windows. Changes in ground level. Odd fence lines. Narrow access points.
These are not glamorous details, but they matter.
A builder will care about where materials can be brought in. A designer will care about light and overlooking from neighbours and other windows. A planning officer will consider how the proposed work relates to the house, the boundary, and nearby properties.
Take photos as you go. Lots of them. The boring corner behind the bins might become useful later.

3. Sketch the way your day actually moves
A home is not a showroom. People rush through it half-awake. Children leave their shoes everywhere. Pets sleep in the most inconvenient spots. Shopping bags need somewhere to land.
So sketch the daily flow.
Where do people come in? Where do coats go? Where does cooking happen? Where will people sit while someone else is making tea? How will the garden connect to the house?
This does not need to be a proper drawing. A rough sketch on paper is enough.
The point is to spot pinch points early. A door in the wrong place can make a lovely room feel awkward. A utility nook can save a kitchen from chaos.
4. Check whether planning permission may be needed
Some home projects fall under permitted development. Others need a planning application. Some depend on size, height, location, previous extensions or whether the property is in a conservation area.
Do not guess.
Check your local council guidance. Speak to your designer, architect or planning consultant if you are using one. Even a simple extension can become more complicated if the house has already been extended or sits near a boundary.
It is better to ask early than to redesign later.
5. Get clear on planning maps
This is where many DIY planners get stuck, but it is one of the easiest parts to sort once you understand it.
Most planning applications need a location plan and a site plan, also called a block plan. A location plan shows the proposed development in its wider surroundings. A site or block plan shows the proposed work in relation to the property boundary and nearby features. Location plans are usually at 1:1250 or 1:2500, while site plans are commonly submitted at 1:200 or 1:500.
In normal-person language, planning maps help the council see exactly where the work is happening.
They show the site. They show the context. They help avoid confusion.
For a home extension, this might mean showing the existing house, garden, access from the road, nearby buildings and the land involved in the application. The application site is usually marked with a red line. Any other nearby land owned by the applicant is usually marked with a blue line.
The good news is that you do not need to become a cartographer. Online OS Planning Maps tools make this much easier than it used to be. With OS Planning Maps from Planning Maps UK, for example, you can search the address, set the boundary, choose the scale and download planning-ready PDF or CAD files. The service uses official Ordnance Survey MasterMap data and supports common planning scales including 1:200, 1:500, 1:1250 and 1:2500.
That is why sorting your map early is so useful. It gives everyone the same starting point. You, your builder, your designer and the council can all look at the same site and the same boundary.
No guesswork. No blurry screenshot. No, “I think the fence is about there.”

6. Make a small “before you apply” checklist
A checklist will save you from the little mistakes that slow things down.
Before you submit anything, check:
- Is the address correct?
- Is the red line around the full application site?
- Does the plan show access from the road, if needed?
- Is the scale right for the type of plan?
- Is North shown clearly as an arrow?
- Are nearby roads and buildings visible enough for context?
- Have you saved the latest version, not the messy first draft?
This is not exciting work. But neither is having an application delayed because the wrong plan was uploaded.
Put everything in one folder. Maps. Drawings. Quotes. Photos. Emails. Council notes. Name the files clearly. Future-you will be very grateful.
7. Keep the project human
It is easy for a renovation to turn into measurements, forms and decisions.
But the reason behind it is usually simple.
You want breakfast to feel less cramped. You want a warmer room. You want space for family visits. You want to stop moving the laptop every time dinner is served.
Keep coming back to that.
The paperwork is there to support the project, not steal all the joy from it.
When the basics are clear, the fun parts become easier. You know where the work is going. You know what the council needs. You know the plan is based on proper mapping. You can make decisions with a little more confidence.
A calmer start makes a better build
A home extension does not begin with a sledgehammer.
It begins with a cup of tea, a few honest conversations and a clear look at the space you already have.
Sort the purpose. Check the outside details. Think about how your day moves. Find out whether planning permission is needed. Get the right OS Planning Maps in place. Keep the paperwork tidy.
None of this is as fun as choosing tiles or imagining the first summer evening with the doors open.
But it makes those moments much easier to reach.
And when everyone can see the same boundary, the same plan and the same end goal, the whole project feels less like a leap and more like a very doable next step.